If you have ever caught your reflection at an angle and noticed your part looks a little different than it did last year, you already understand why at-home scalp analysis is having a moment. We track our skin with apps, our sleep with rings, our steps with watches. Meanwhile the scalp — the skin that actually grows our hair — usually gets nothing more than a quick shampoo and a silent hope. Scalp analysis at home is simply the practice of looking, recording, and comparing, so your scalp care routine is built on what you actually see instead of what you assume.
The good news is that you do not need a clinic, a prescription, or a complicated setup. You need decent light, a consistent photo, and a willingness to treat your scalp like the skin it is. Here is how to do it thoughtfully.
Scalp Analysis at Home: What It Really Tells You
At its core, scalp analysis is observation. You are checking in on the condition of your scalp — how it feels, how it looks up close, where it is comfortable and where it is not — and you are doing it on a rhythm rather than in a moment of panic. That is it. No diagnosis, no scary vocabulary, no late-night doom-scrolling required.
What makes at-home scalp analysis genuinely useful is comparison. A single look at your scalp tells you very little, because you have no reference point. The same view, captured the same way every two to four weeks, tells you a story. Maybe your scalp feels less tight since you started rinsing with cooler water. Maybe the flaky patches near your hairline look calmer after you stopped layering heavy products there. Maybe nothing has changed at all — which is also information, and often a relief.
The four things worth tracking
You can keep this as simple as a note on your phone. Each time you check in, look at the same four things:
- Comfort. Does your scalp feel tight, itchy, dry, oily, or simply neutral? Rate it on a one-to-five scale.
- Appearance at the part and hairline. Note visible scalp, redness, flaking, or product buildup along the part line.
- Oil balance and texture. How quickly does your scalp feel oily after washing, and is there any residue left behind?
- How your hair behaves. Root lift, shine, and how your hair sits on day two are all quiet clues about the scalp underneath.
None of these are medical measurements, and they do not need to be. They are beauty observations, and they are more than enough to guide a routine.
One more note: resist the urge to compare your photos to a stranger’s on social media. Their lighting, their hair type, and their starting point are not yours. Your only useful benchmark is your own last check-in.
Shop the scalp ritual
-
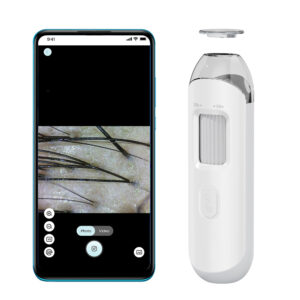
Rootli Scope AI-Connected Scalp & Follicle Analyzer
Price range: $158.00 through $178.00 Select options This product has multiple variants. The options may be chosen on the product page -
How to Set Up Your First Scalp Analysis Session
Pick a moment when you have ten quiet minutes, ideally on a wash day before you apply any styling products. Good lighting matters more than any gadget. Stand near a window or under bright, even bathroom light, and use a hand mirror alongside your main mirror so you can see the back of your head without twisting into a pretzel.
What to have nearby
- A hand mirror plus your phone or camera
- Clean, dry hands and a clean comb or brush
- Consistent light — daylight is ideal, but steady overhead light works too
- Optionally, a scalp camera such as the Rootli Scope AI-Connected Scalp & Follicle Analyzer, which gives you a magnified look at the scalp and follicle area so small shifts are easier to notice
A simple ten-minute flow
- Part your hair in the same three or four places every time — for example, center, left, right, and one diagonal.
- Look at each section in the mirror. Notice comfort, tone, flaking, and density without judging any of it.
- Take one photo per section, from the same distance and angle as last time.
- If you are using a scalp camera, capture the same spots you photographed with your phone.
- Write two or three sentences in your notes app: the date, how your scalp feels, and anything you changed since the last check-in.
If you would rather start with a guided approach, the Rootli Diagnostic Pro is built for exactly this stage — understanding your scalp before you choose a ritual, so your routine begins with observation instead of guesswork.
Before-and-After Tracking: Photos, Notes, and Realistic Expectations
Before-and-after photos are the most motivating part of scalp analysis, and also the easiest place to accidentally fool yourself. Lighting shifts, hair is styled differently, the camera creeps closer, the part sits slightly off — and suddenly you are comparing two completely different situations.
How to take photos you can actually compare
- Same spot, same light, same time of day. Morning light near a window is easy to repeat.
- Same hair state. Choose freshly washed and air-dried, or dry on day two — then never switch.
- Same distance. A piece of tape on the floor sounds silly and works beautifully.
- No flash, no filters, no zoom. Zoom crops differently every single time.
- Label the file with the date so your camera roll does the archiving for you.
Then wait. Scalp and hair changes move slowly, which is exactly why a photo from three weeks ago is far more useful than a photo from yesterday. A reasonable rhythm is a full check-in every two to four weeks, with a bigger review at the three-month mark. That timeline is not a promise about results — it is simply how long it takes for a pattern to become visible.
When you compare, look for direction rather than drama. Is your scalp more comfortable than it was? Does your hair look glossier or sit a little fuller at the roots? Is your routine easier to keep? Those are the wins worth writing down, and they tend to matter more than any single close-up.
Matching What You See to a Ritual That Fits
Once you have a few weeks of notes, patterns start to surface, and patterns are what make product choices feel obvious instead of overwhelming. Here is how to read a few common situations.
If your scalp mostly feels dry and tight, lean into gentle, nourishing steps. A lightweight daily serum like Rootli Serum applied along the part lines keeps things comfortable without weighing hair down, and a five-minute massage with the Rootli Stone Comb – Scalp Gua Sha is a lovely pre-serum prep that also helps you slow down.
If your scalp tends to feel oily or congested, focus on consistency and clean application. The Rootli Serum Comb Serum-Infusing Scalp Massage Brush helps you massage and distribute product evenly across the scalp instead of concentrating it in one spot.
If your main goal is a spa-like weekly ritual you will actually look forward to, warm hands-free sessions are the easiest habit to keep. The Rootli Cap turns a quiet evening into a weekly warm scalp spa moment, while the Rootli Pulse Pro – LED Light Cap offers hands-free red and blue light scalp care you can wear while you read or answer emails.
And if your before-and-after photos show you want broader coverage in your routine, the LED Power Duo pairs full-scalp LED coverage with targeted comb care — a natural next step once your notes tell you where you actually want to focus.
Your Next Step: One Photo, One Product, One Week
Scalp analysis is not about becoming your own dermatologist. It is about paying attention — the same way you notice that a moisturizer makes your cheeks feel calmer, or that a certain pillowcase leaves your skin happier. Take one photo today. Write one honest sentence about how your scalp feels. Choose one tool or product that matches what you saw. Then repeat in two weeks and let the comparison do the rest.
Your scalp has been waiting for the same care you give your face. Start small, stay curious, and let the mirror and your notes guide you from there.